
 Language


More Language
Language One-stop comprehensive solution provider

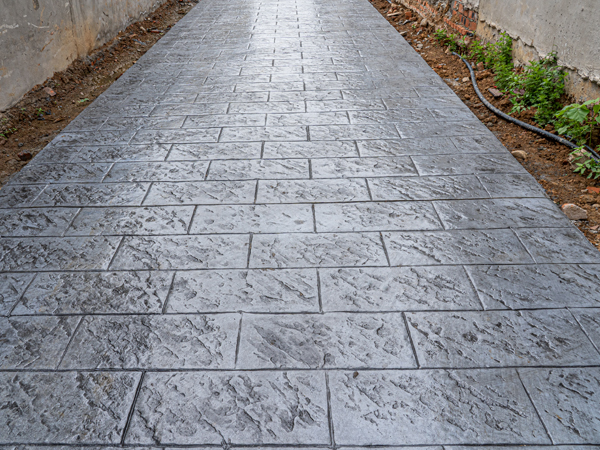
Stamped concrete flooring is installed concurrently with the concrete pour itself. The process requires a specific set of materials and equipment: the base concrete, surface finishing materials, color hardener, release agent, sealer, stamping molds, and specialized installation tools. Thanks to advanced technology and rigorous construction management, the system forms an integrated structure that can be completed in a single operation—offering a streamlined, rapid installation process and superior structural integrity.
 |  |  |
|  |  |
Artistic stamped concrete requires three essential materials: strengthening agent, release powder, and sealer. These correspond to the three core processes—coloring and hardening, mold release and anti-stick, and final protection and color fixation. Only when used together can they produce durable, clearly textured, and fade-resistant stamped flooring. Below is a detailed explanation of each product's function and standard application procedures.
1. Artistic Flooring Strengthening Agent (Colored Hardener) – Main Functions
1. Applied as a dry-spread surface layer on fresh concrete, it bonds with cement hydration products to significantly increase floor hardness, resistance to compaction, and prevent sanding or dusting, meeting requirements for both vehicular and pedestrian traffic loads.
2. Provides permanent, uniform coloring through inorganic weather-resistant pigments that penetrate throughout the concrete surface, differing from surface-painted coatings. This ensures excellent UV resistance and prevents fading or peeling, even under outdoor exposure.
3. Forms a dense, colored base layer suitable for stamping, with optimal softness and firmness, enabling clear replication of stone, wood grain, or brick textures during imprinting.
4. Enhances waterproofing and alkali resistance by compacting concrete pores, reducing water infiltration and surface whitening or efflorescence.
2. Application Method for the Hardener
1. Substrate: Pour concrete with a strength grade of C25 or higher, with a thickness of at least 5 cm; properly vibrate and level, ensuring sufficient surface slurry.
2. Timing: Apply after initial set (when no standing water remains and footprints leave shallow impressions)—typically 2–3 hours in summer, 4–6 hours in winter.
3. Dosage: 3–5 kg per square meter, applied in two stages:
- First stage: Spread 2/3 of the total amount evenly across the surface. After absorbing moisture and darkening slightly, smooth and polish thoroughly.
- Second stage: Sprinkle the remaining 1/3 perpendicular to the first layer, correct any color differences, and perform a second polishing.
4. After finishing the polishing, allow the surface to rest for an appropriate period before applying the release powder.
Precautions: Do not add water for mixing—only dry spreading is permitted. Construction is prohibited in low temperatures or during rainy conditions.
III. Release Powder (Release Agent / Colored Release Powder) – Main Functions
1. Prevents mold adhesion: When pressing embossing molds onto the surface, it separates the mold from the colored top layer, avoiding sticking and damage to texture edges, ensuring smooth and intact patterns.
2. Creates vintage dual-tone texture (core visual effect): The reinforcing material serves as the base color, while the release powder acts as the contrasting color. After stamping, the powder remains in the recessed grooves, while excess powder is removed from raised textures, producing a deep-and-light antique stone appearance.
3. Delays surface setting slightly: It helps slow down initial surface curing, extending the working time for stamping and facilitating large-area application.
IV. Application Method of Release Powder
1. Timing: After finishing the troweling of the reinforcing material, when the floor has achieved proper workability.
2. Apply evenly in a thin layer across the entire surface; apply slightly more at edges and joints.
3. Place the stamping molds and use a tamper to uniformly press them into place, creating consistent patterns across the entire area.
4. Allow the stamped surface to cure undisturbed for 24–48 hours until fully hardened.
5. After curing, rinse off excess powder with a high-pressure water hose and allow the surface to dry naturally.
6. Additional Tips:
- For best antique effect, pair light-colored floors with dark release powder.
- Avoid over-application—excessive powder may be difficult to remove later and can cause hazing or whitening on the surface.
V. Floor Sealing & Protective Coating (Acrylic Topcoat / Polyurethane Topcoat)
Available in water-based and solvent-based types, this is the final protective step in flooring. Key functions include:
1. Color retention: Prevents fading and whitening by sealing capillary pores, blocking UV rays, rainwater, and acid rain, locking in the base color and significantly extending outdoor service life.
2. Waterproof and stain-resistant: Prevents water penetration; oil spills and mud can be easily wiped away, reducing dirt accumulation and discoloration in courtyards and driveways.
3. Surface reinforcement: Enhances resistance to freeze-thaw cycles, repairs fine capillary cracks, prevents cracking during winter weather, and further improves wear resistance.
4. Aesthetic enhancement: Glossy finish brightens and enhances transparency; matte finish provides a warm, antique look, eliminating water marks and color variations.
VI. Application Method
1. Precondition: After rinsing off release powder, ensure the floor is completely dry (ideally air-dried for 2–3 days in sunny conditions).
2. Mixing ratio: Single-component products are applied directly via roller; two-component products must be mixed thoroughly according to manufacturer’s instructions.
3. Application: Use a wool roller to apply in cross-directional strokes. Apply two coats:
- First coat: Thin application for base penetration and sealing.
- Second coat: Applied after first coat dries completely, ensuring even and full film coverage.
4. Curing: Allow 24 hours in well-ventilated room temperature conditions before light foot traffic; full curing takes 7 days before vehicle traffic.
VII. Important Notes
1. Never apply on damp surfaces—this may lead to blistering, whitening, or coating delamination.
2. Avoid midday application during windy or extremely hot weather.
3. For outdoor applications, prefer weather-resistant acrylic sealers to prevent yellowing.
VIII. Complete Construction Sequence Summary
Concrete pouring and leveling → Dry-spread colored reinforcing material twice with troweling → Sprinkle release powder → Stamp with molds → Cure for 1–2 days → Rinse off loose powder with high-pressure water and let dry → Roll on two coats of protective sealer → Finished floor
